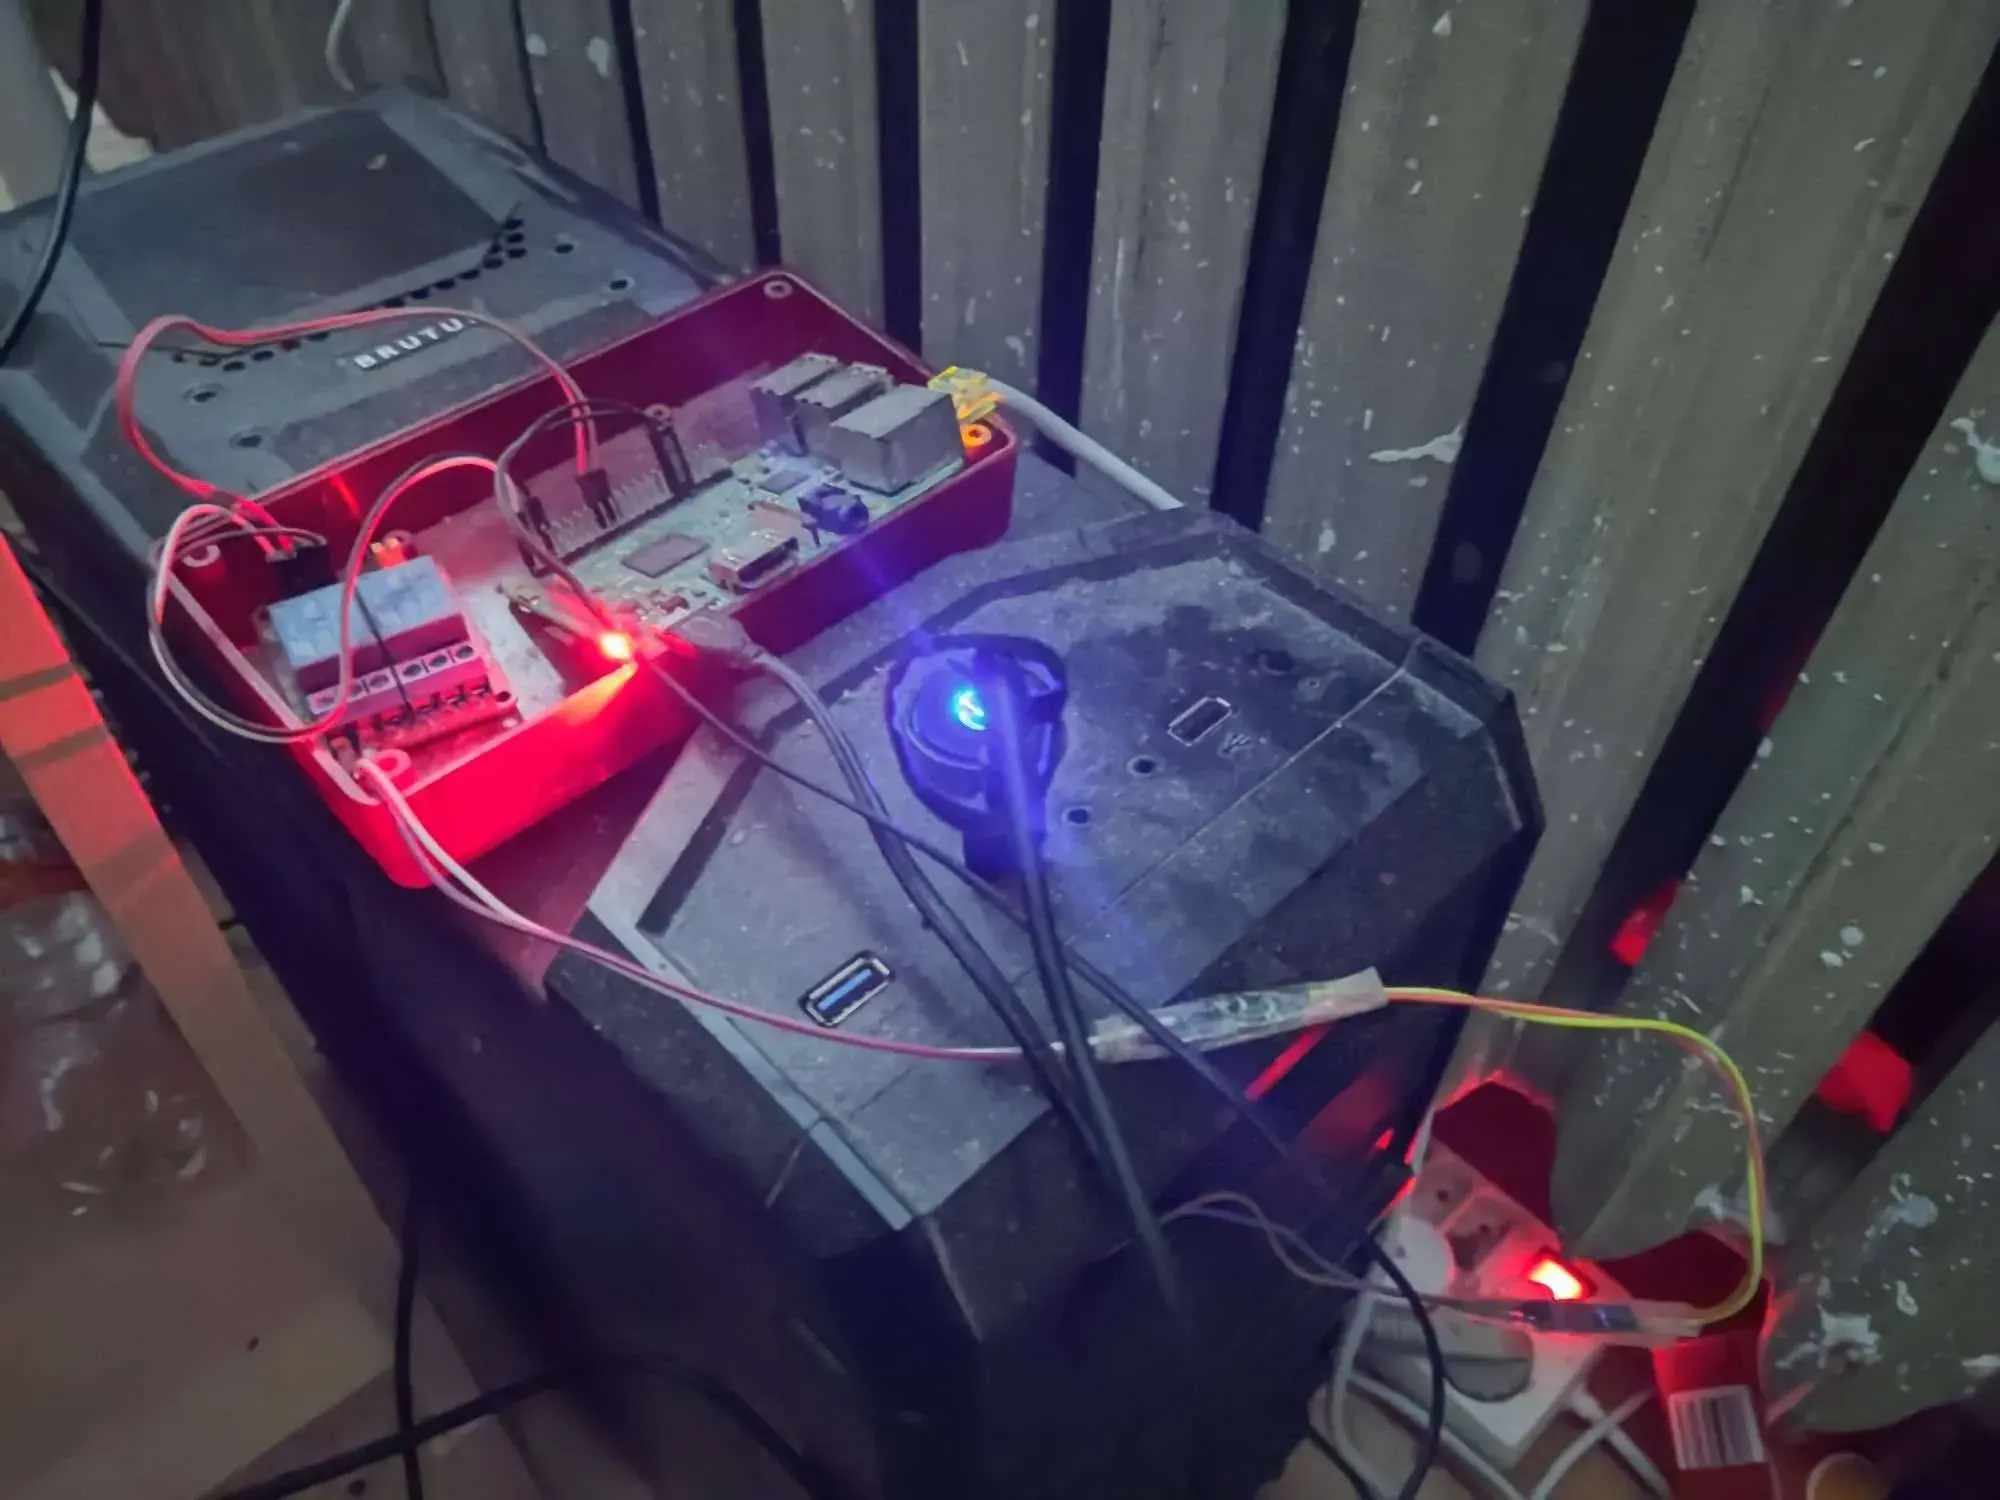
What you need:
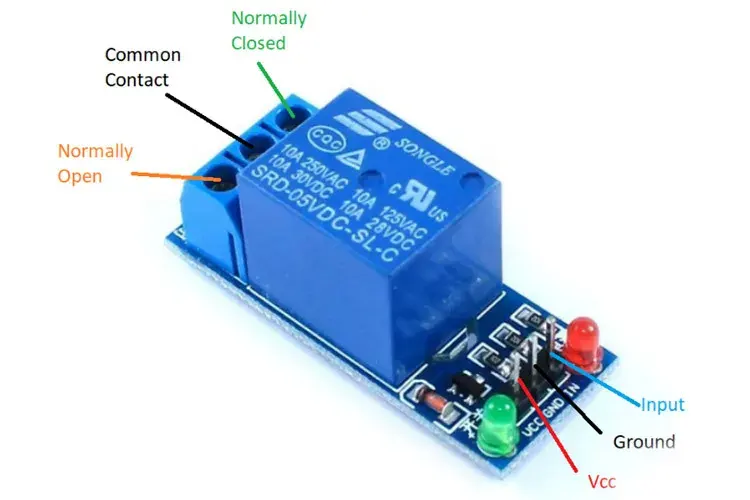
- a 5V relay module
- Raspberry Pi
- a bunch of cables
Explanation:
A power button on a computer case lets electricity flow between two power pins upon it being pressed, which is when the motherboard detects the button is pressed and reacts accordingly.

A relay is a specific kind of switch which lets electricity flow conditionally upon the flow of electricity in another circuit. The voltages involved both in motherboard power pins and on Raspberry Pi are generally low to not damage both, but we’re taking extra precautions to electrically separate them both.
“5V relay module” here means that 5V is the voltage that is required for the relay module to work, while the controlling voltage can be lower. It being relay module it means it also has a flyback diode we’d otherwise have to provide ourselves.

Raspberry Pi’s GPIO pins are programmable and can be controlled through Python code, and operate on 3.3V. Raspberry Pi also provides 5V output, but this one is not controllable.
By
- connecting a power button to rPi GPIO pins
- connecting the 5V voltage output pin from rPi to the relay module’s Vcc input pin
- connecting the ground pin from rPi to the relay module’s groud pin
- connecting programmable GPIO pins as the relay module’s input pin
- connecting the relay module’s outputs (the normally open one and the ground) to the motherboard power pins
- running some code on rPi
We can extend the power button functionality so Raspberry Pi can turn on and off our computer, while also still keeping the power button working.
Which is what I use to remotely turn on my computer on, by SSHing to rPi and running a script to turn the PC on while I’m away from home.
Why not Wake-On-LAN?
Wake-On-LAN has restrictions which makes it not as reliable as it could be, for example:
The code and explanation for it in Part 2, when I get to writing it.